Sunday, August 8, 2010

White Peach and Raspberry Cobbler


Peaches and raspberries are some of my favorite reasons to have summer (notwithstanding the big ticket items like beach, warm, and happiness).  This is a relatively simple dessert with unadorned flavors, but the freshness of the fruit and a big old dollop of [real] whipped cream really delivers a tasty, seasonal punch.


Makes 4 individual cobblers.  Double the recipe and use a casserole dish if you want to make a larger batch to serve family style.  You'll probably need to up the cooking time by a bit, also.  Watch it very carefully, because to burn it would be a tragic loss.


White Peach and Raspberry Cobbler
for the cobbler

  • 2 large white peaches
  • 1 cup fresh raspberries
  • 2 tablespoons sugar
  • 1 teaspoon lemon juice
  • 2 teaspoons cornstarch
for the crust
  • 1 heaping cup flour
  • 1/2 teaspoon baking powder
  • 2 tablespoons brown sugar
  • 1 tablespoon white sugar
  • 2 ounces (1/2 stick) butter, melted
Preheat the oven to 375.

Slice the peaches into comfortably bite-sized pieces, and place in a bowl with as much of the peach juice as possible.  Add the berries, sugar, cornstarch, and lemon juice.  Gently stir to coat the fruit evenly.

In a separate bowl, mix all the dry ingredients for the topping.  Slowly pour in the melted butter while stirring, and work into the flour until the mixture resembles coarse breadcrumbs.


Grease 4 ramekins.  Evenly distribute the fruit among the 4, and top the ramekins with a layer of the flour mixture.  Place them on a foil-lined baking sheet or pan (to catch the drips) and bake for 25 - 30 minutes until the fruit is bubbling and the topping golden brown.  Serve with freshly whipped cream.


Sunday, August 1, 2010

Summer Farmers Market Salad

In the height of the summer when vegetables are fresh (as in, were alive on the plant that day or the day before), you don't really have to do fancy things to make them taste better, because they just taste good the way they are.  You don't have to cover up boring tastes or anything.  This is a great example of how to make a delicious, unadorned salad out of summer produce at its freshest.  I'm sure you could do something similar with just about any vegetable from the market this time of year.


Summer Farmers Market Salad


  • baby arugula
  • sliced heirloom tomatoes
  • sliced lemon cucumber
  • extra virgin olive oil
  • salt and pepper
Layer the tomato slices and cucumber on top of a bed of arugula (peel the cucumber with a vegetable peeler, if necessary).  Drizzle with a little olive oil, and season with salt and freshly ground pepper.

Sunday, July 11, 2010

Grilled Chicken and Peaches Salad

So I kind of stole from was inspired by my cousin's yoga/health/beautiful blog for this recipe, which looked so simple that I thought there had to be a catch to it.  I made it and was really pleased with the bright, fresh mix of flavors.  There's sweetness from the peaches, a little bite from the onion, some tang from the blue cheese, and some pepperiness (is that a word?  my spell check doesn't think so) from the arugula.  Put it all together and you've got yourself on seriously good, filling, summer salad.

You can cut up the chicken breast into cubes and serve it in the salad, or leave the breasts whole and serve the salad as an accompaniment.  I used baby arugula, but if you're using fully grown, remove the hard stems.


Grilled Chicken and Peaches Salad


ingredients for one serving (multiply as necessary)

  • 1/2 fresh peach, sliced
  • 2 slices of red onion, rings separated
  • 1 chicken breast, pounded flat and even throughout
  • extra virgin olive oil
  • 2 tablespoons balsamic vinegar
  • salt and pepper
  • 1 handful arugula 
  • blue cheese crumbles, to garnish
Place the peach and onion slices in a bowl.  Drizzle with a little olive oil and a little salt and pepper, and stir to coat evenly.  Place on a hot grill and cook, about 2 minutes a side or until soft with obvious grill marks.  Remove them and place them back in the bowl, allowing the juices to collect at the bottom.  Add a tablespoon of balsamic vinegar, and gently stir to combine with the juices and coat the peaches and onions.  Add a little more olive oil if desired.

Coat the chicken breast with a little olive oil, salt, and pepper.  Cook on the grill, about 4-5 minutes a side, or until done in the middle.  Take the chicken off the grill and coat evenly with a tablespoon of balsamic vinegar.  Add back to the grill for about a minute on both sides.

Top the arugula with the peaches, onions, and a little blue cheese.  Serve with the chicken breast.


Tuesday, July 6, 2010

Tomato, Mozzarella Bruschetta

Okay, people, I know.  You don't have to tell me.  The last recipe which I posted 2 measly days ago was a tomato, mozzarella, basil recipe, and here I am, giving you another one.  I will remind you that I warned you I would do this.  And in my mind, I had planned on saving this recipe for later, putting a little buffer of other zucchini or squash recipes (as my garden is mass-producing them at the moment), but I couldn't wait.  This stuff is good.

You also don't have to tell me that it doesn't look that pretty, because I know that it doesn't.  I also didn't really get a chance to take a great photo of it all fancy on little toasts (that look like this), so you're not getting the full effect.  However, trust me.  I may have led you astray a time or two before, but stay with me.  This was made with tomatoes from the vine, and basil that had been attached to a plant 2 minutes before it was served.  Tomatoes are in season, so go buy (or better yet, pick) a million and eat them up.

Tomato, mozzarella bruschetta

ingredients
  • 2 French baguettes
  • extra virgin olive oil, for drizzling on the bread, plus about 1/4 cup for the tomatoes
  • About 1/3 cup pine nuts
  • 1 pound fresh, firm tomatoes (you can certainly use more and adjust the proportions, as you like)
  • 1 pound fresh mozzarella cheese
  • 1 can great northern beans, drained
  • Salt and pepper, to taste
  • 1 handful fresh basil leaves
Slice the baguettes on an angle about 1/2 inch thick.  Place on a cookie sheet, and drizzle with olive oil.  Broil in the oven for a few minutes, until golden (my broiler on low took about 4 minutes, so watch carefully to not burn them).

Put the pine nuts in a dry frying pan on the stove on medium heat.  Shake the pan every so often until the pine nuts are golden.  Don't let them burn.  Remove from the heat, and let cool.

Dice the tomatoes and cheese to about 1/4 or 1/3 inch cubes.  Drain some of the water from the tomatoes, if necessary (you don't want too much liquid in the mix).  Place them in a large bowl with the beans.  Add up to 1/4 cup olive oil (enough to coat everything without puddling at the bottom), and salt and pepper to taste.  Let  come to room temperature.

Tightly roll the basil, and slice it very thinly.  When ready to serve, add the basil and pine nuts, and stir to incorporate.  Serve on the baguette slices.      

Sunday, July 4, 2010

Caprese pasta salad


I love summer, and it's not just for the pool and no school and the beach and contagious happiness and all that jazz.  I love being able to walk to my not-so-little tomato plant, pluck off a big ole' tomato, and then eat it within the hour.    


I had long considered how I would eat my first tomato from the vine, and I decided on this old favorite.  I wanted something simple that wouldn't distract from the tomato's own flavor, and this combination of tomato, basil, and mozzarella never gets old (I will warn you, I'm not done with it this summer, either, so get excited for a few variations).  It was even a better plus that I could grab some fresh basil from the garden. too.


Caprese Pasta Salad


ingredients

  • 1 pound dry pasta (I used mini Farfalle)
  • 1 pound ripe tomato (I used an heirloom tomato, because that's what I was growing)
  • 1 pound fresh mozzarella cheese
  • 1 handfull fresh basil leaves
  • about 1/4 cup extra virgin olive oil
  • 2 tablespoons red wine vinegar
  • 1/2 teaspoon garlic powder
  • salt and pepper, to taste
  • Parmesan cheese, to garnish
Boil the noodles in salted water until al dente (don't let it get soggy).  Rinse in cool water, drain, and set aside to cool.

Chop the tomatoes and mozzarella in an approximately 1/3 inch dice.  Roll the basil leaves tightly like a cigarette and slice thinly, making long strips.  Combine the tomato, mozzarella, and basil in a large bowl with the olive oil, vinegar, garlic, salt, and pepper.  Stir to combine and coat.  Let sit for a few minutes, while the pasta continues to cool.

When the pasta reaches room temperature, shake to ensure it's dry, and then combine it with the tomato mixtures.  Stir to coat.  Add more olive oil if necessary to coat everything.  Taste for seasoning, and adjust if necessary.  Top with the Parmesan cheese, and serve at room temperature.

Wednesday, June 23, 2010

Breaded, Pan-fried Zucchini

So, this garden of mine has started producing, and it hasn't stopped.  Sometimes I'll go out to water and there will be a full grown zucchini when I am quite sure there wasn't one there yesterday.

Needless to say, I have been trying to find different ways to prepare them (and people to give them to).  This particular way gives some nice texture and flavor.   Just for reference, the ones in the picture are cut just a little too thick--the insides didn't quite cooked through when the outsides were finished.
Breaded, Pan-friend Zucchini


Ingredients

  • 2 medium zucchini, cut about 1/3 inch thick.
  • about 1 tablespoon salt
  • 1 tablespoon butter
  • about 2 tablespoons extra virgin olive oil
  • 1 egg, beaten
  • about 1 cup Italian style dry bread crumbs 
  • pepper, to taste
  • Parmesan cheese, to garnish
Toss the zucchini slices with the salt.  Place the slices between several layers of paper towels for 10-20 minutes.  This draws out the moisture, letting them cook more evenly and firmly.  Dry off each slice with a paper towel, removing any excess salt.

Heat the butter and olive oil in a frying pan over medium heat.  Dip the zucchini slices in the egg mixture, then coat with the bread crumbs (I add some pepper to the bread crumbs, but you decide to taste).  Place the slices in the pan (don't crowd them), and cook about 4-5 minutes a side, until golden brown.  If they're browning too quickly, turn down the heat because you want them to cook through.  

Serve warm topped with some Parmesan cheese. 

Sunday, June 20, 2010

Peaches and Cream with Raspberries


This is a simple, clean, easy dessert that really showcases some of summer's best.  I love myself some fresh peaches, and my fridge will often have several during the summertime (there is nothing as refreshing as coming home on a hotter-than-Hades day and sinking your teeth into a cold, juicy peach and having the juice run down your chin and it's amazing; trust me).

Now, you can whip the cream if you want (you'll want to use whipping cream, in that case, rather than light cream), but I prefer just a bowl-full of peaches in liquid, so that's what I give here.  You go do whatever you want.
Peaches and Cream with Raspberries


Ingredients

  • 1 peach per person
  • brown sugar
  • cinnamon
  • light cream (you can use heavier if you want), about 1/2 pint for every 4 peaches
  • white sugar
  • vanilla
  • fresh raspberries
for the peaches
Preheat the oven to 400.  Butter a casserole baking dish.  Cut the peaches in quarters, and toss with a generous helping of brown sugar and a dash of cinnamon, to coat.  Bake until soft, about 15 minutes (although this can vary widely based on how firm your peaches are to start).

for the cream
For every 1/2 pint of cream, whisk in 1 teaspoon vanilla and 1 tablespoon sugar, until incorporated.

Dish out the peaches into bowls, giving them as much of the pan juices as you can.  Evenly distribute the cream among the bowls.  Top with the raspberries.

Saturday, June 12, 2010

Sautéed Yellow Squash


I hope this doesn't sound morbid, but guys, I grew that squash myself and I have been so excited to eat it.  It was grown in the coolest community garden you've ever seen.  I've had a few squash casualties along the way, so I was pretty happy to get this one out alive and whole and perfect and amazing.  I served it with a little rosemary from the garden, too, making it amazing.   


My good buddy taught me a while ago to sweat zucchini and squash before sautéing them.  This draws out quite a bit of the moisture in them, letting them sear and brown rather than get all squishy.  As excited as I was  to eat the thing, I'm glad I took his advice.  The finished project was beautifully browned and just a little crisp and full of love and earthy goodness.


Sautéed Yellow Squash

ingredients
  • one large yellow squash
  • up to 2 tablespoons salt
  • 2 tablespoons extra virgin olive oil
  • 1 tablespoon butter
  • A pinch of chopped herbs, like rosemary or oregano
  • Pepper to taste (plus salt, if necessary, but likely not)


Cut of the ends of the squash, and cut into rings, about 1/2 inch think.  In a bowl, toss the squash slices with some salt until well coated.  Place the slices on a few layers of paper towels, then top with a few more layers. Press down lightly, and let sit about 20 minutes.  Adjust the paper towels if they're getting too damp.  When done, give each slice a little rub-down with a paper towel to remove excess salt and moisture.


Heat the olive oil and butter in a frying pan over medium heat.  When hot, add the squash slices in a single, uncrowded layer.  Top with a little pepper and herbs.  Let simmer a few minutes, until slightly golden.  Flip them, and repeat on the other side.  Serve and enjoy summer's bounty.


Thursday, June 10, 2010

Coconut Lime Cake

So, I'm cheating right now. Usually I don't like to just copy someone else's recipe entirely, but this one is going to have to be a little exception. I love this cake, and I make it very frequently. Unlike the original recipe (which I gratefully and humbly pilfered from SmittenKitchen), I usually serve it with a raspberry or strawberry coulis, it's not exactly the radical reinterpretation or perfected product of experimentation I usually strive for. Instead, this is just an old stand-by, tried and true recipe that you should make, because it's really good.

The cake is kind of crumbly, I've found, which I do not think is a bad thing. The icing topping gives it some necessary structural integrity. You should also be very careful about the cake sticking to the pan, so grease and flour it well (and seriously just have the patience to let it cool entirely before you pull it out of the pan--it's a tragic mistake I've made many times).


Coconut Lime Cake

ingredients

for the cake


  • 1 1/2 cups sweetened flaked coconut
  • 1 stick unsalted butter, room temperature
  • 1 1/4 cup sugar
  • zest of 1 lime
  • 2 eggs
  • 1 3/4 cup self-rising flour
  • 3/4 cup milk
  • about 3 tablespoons lime juice
for the icing
  • 1 cup powdered sugar
  • about 3 tablespoons lime juice
for the raspberry sauce
  • 1 small bag frozen raspberries
  • about 2 heaping tablespoons sugar
  • coconut milk, to garnish (optional)
For the cake.  Carefully brown the coconut on a cookie sheet in the oven at 350 degrees.  Watch it carefully to avoid burning; stir once or twice if the edges brown faster than the rest.

Cream the butter, sugar, and lime zest together in a mixer until even and fluffy.  Add the eggs, one at a time, beating in between until even throughout.  

Mix half of the toasted coconut into the flour.  Also mix 2 tablespoons of the lime juice into the milk, and stir vigorously.  With the mixer on low, add some of the flour mixture, then half of the milk, then some more flour, then the other half of the milk, then the rest of the flour.  Make sure the mixture is smooth and even between each addition.

Pour the batter into a well-greased and floured 8x8 square baking pan.  Bake in the oven at 350 degrees for about 40 minutes, until a toothpick inserted in the middle comes out clean.

While the cake is baking, make the raspberry sauce by putting the raspberries and sugar in a small saucepan on the stove on medium-low.  Allow it to simmer, stirring occasionally, until the berries are very soft.  Smash them up, somewhat, for a chunkier sauce, or puree until smooth in a blender if desired.  Let cool.

Prepare the icing by mixing the powdered sugar with 3 tablespoons of lime juice, stirring until smooth.  If it's still too thick, add a little more lime juice (or milk, if you think the icing is too tart).  

When the cake comes out of the oven, allow it to cool completely (seriously, completely).  Run a knife along the edges of the pan, place a square plate or platter on top, and flip it over onto the plate.  Tap the pan if it needs a little convincing.  Turn the cake right-side-up onto another serving dish, and pour the icing over, followed by the remaining flaked coconut.  Serve with some of the raspberry sauce, with a little coconut milk swirled into it for contrast.

Sunday, May 2, 2010

Lessons learned from my mom

My mom may not be what you would call a gourmet chef (although after the kids all moved out, she has been producing some seriously impressive meals--her homemade pasta nowadays is amazing), but I have learned some very special lessons about food and life from watching my mom cook for my family. On Mother's Day, I thought I'd share some of them with you.

1. Use real whipped cream. Special occasions call for special food, and real whipped cream is just better than the fake stuff. Mom believes this. While she is one of the healthiest eaters and cooks I've ever met, that blessed dollop of home-whipped love is pure joy for Mom. It makes special occasions special. It makes fresh strawberries sing. It made her children very happy. You, too, can make your life better by using real whipped cream.


2. Like everything. I have never heard my mother give a blanket statement like, "Oh, I don't like _____" (except once she said she didn't like okra, but I think it's only because she hasn't tried this). With this fact in mind, I really don't understand how she produced the pickiest eaters in the world. Each one of us had long lists of things we didn't like, which we made very clear: no mushrooms, onions, peppers, squash, zucchini, green beans, cucumbers, asparagus, fish or any seafood, spinach, tomatoes, pickles, olives, and I'm sure lots of other things. However, Mom kept making it anyway, telling us that someday we would like them. You know what, she was right (I still think Lin will come around and eat onion one of these days).


3. Sacrifice for people you love. We had seven people in our family, and inevitably any sort of treat or dessert would come in packages of six. You guessed it--Mom never got one. The doughnuts or cans of soda or cookies or whatever would go to everyone else, with Mom hoping that maybe she could just get a bite from one of her often unappreciative children. I'm sorry to say that often, we didn't even notice. However, Mom ate the brown bananas after everyone else took the new ones. She ate leftovers for lunch when everyone else turned their noses up at them. And you know what, I never heard her complain. Ever. That woman is a saint.

4. Eat together. Imagine this battle: 5 children with entirely different schedules + business executive husband with constantly fluctuating hours vs. Mom's shear will. Mom wins. We ate dinner together as a family just about every night (Mom once told me that it wasn't even worth it to cook for only 5 people). We may have fought to the death to be out playing with friends or watching TV or any number of other things, but we ate together as a family. However, those moments at the dinner table together remain one of the strongest forces that built the love and unity we have in the family. Those precious moments with rice pilaf or orange roughy and brussel spouts showed me how much Mom loved us and was committed to us as a family. We belonged together, and she wanted us to know it and eat like it.

Happy Mother's Day, Mom. I love you.

What lessons did your mothers teach you from the kitchen?

From the earth, with love


There are a few little seedlings I call my own thanks to a community garden at church.


Come this summer, look forward to recipes with squash, zucchini, basil, red peppers, and heirloom tomatoes.

Friday, April 30, 2010

Creamy Cranberry Porkchops with Mushrooms


One of the real keys to this dish is getting the right type of cranberry juice. Don't get a cranberry cocktail--those are just too sweet and too thin. Look for an unfiltered kind or a 100% juice variety. I used a cranberry-pomegranate juice, and it was great.


Creamy Cranberry Porkchops with Mushrooms

ingredients
  • 2 tablespoons extra virgin olive oil
  • Salt and pepper
  • 4 boneless pork tenderloin chops
  • 2 tablespoons butter
  • 1 pint sliced mushrooms (I used baby bella)
  • 1 finely diced shallot
  • 1 teaspoon minced garlic
  • 1/4 cup cranberry juice
  • 1/2 cup heavy cream
  • 2 springs fresh thyme
Heat the olive oil over medium heat in a flat-bottomed frying pan. Salt and pepper both sides of the porkchops, and then add to the hot oil. Cook for a few minutes on both sides until you can't see any more pink from the exterior (the length of time will vary depending on how thick your chops are). They don't have to be cooked all the way through here, as you'll heat them again at the end.

Remove the chops to a plate. Add the butter to the pan, and reduce the heat just a little. Saute the mushrooms until browned, but not soggy. Remove them to a plate, retaining as much liquid in the pan as possible.

Add the shallot and garlic to the pan, and cook until golden. Add the cranberry juice and cream, and dissolve any browned bits on the bottom of the pan. Add the porkchops back to the pan, covering them with the sauce. Turn them after about 3 minutes, add the mushrooms, and continue to heat them, about 5 minutes longer.

Tuesday, April 27, 2010

Asian Noodle Vegetable Soup

I don't know about where you live, but in Carolina we're enjoying a transcendentally beautiful Spring. However, every now and again we get a really chilly night. After coming back from a run on a particularly nippy evening, I needed something to warm me up a bit. Looking through my cupboard for something to warm me up, I ran across a package of cellophane noodles (also known as bean threads), and decided to have a go at it.


This just kind of a thrown-together vegetable broth, but on that chilly night, it hit the spot just right. You can pretty much throw in anything you want or happen to have around, and I think you'll be fine.


Asian Noodle Vegetable soup

ingredients
  • 1 tablespoon vegetable oil
  • about 1/4 finely diced onion
  • 1 minced garlic clove
  • 1 tablespoon ground ginger
  • 2 cups water
  • 3 cups vegetable broth
  • 2 tablespoons soy sauce
  • 2 large, thinly-sliced carrots
  • 3 sliced celery stalks
  • 1 cup frozen peas
  • 1 tablespoon sesame oil
  • 3.75 oz package of cellophane noodles (bean threads)
In a heavy-bottomed saucepan, heat the vegetable oil over medium heat. Add the onion and stir until translucent. Then, add the garlic and ginger and stir until golden.

Add the water, broth, and soy sauce. Raise the temperature and bring the liquid to a boil. Reduce the heat to a simmer. Add the carrots and celery, and simmer about 5 minutes until slightly soft. Add the peas, and allow them to heat through (don't overcook the peas). Add the sesame oil, and stir vigorously.

Reduce the heat, then add the noodles. Let them soak, stirring frequently, until soft (maybe 8 minutes, or so). Taste for salt, and add some if necessary, but I didn't think it needed any.

Saturday, April 24, 2010

Guest post: Curried Apple Orzo Salad

So, as I've mentioned before, the purpose of this blog is to celebrate experimentation. Sometimes that means developing a recipe from scratch. Sometimes it means tweaking grandma's secret recipe (I won't tell if you won't). And sometimes it means trying to recreate the flavor from a dish in a random restaurant which has been haunting you for sometime. You long-time readers may recognize this dish, as I actually tried to recreate it some time ago. This is my favorite dish to get at the little deli in my building for lunch. It has a little spicy-sweet kick that is really interesting.

I promise you that this version is better than my attempt; I'm not too prideful to admit that. Nice work, Jenn.

Curried Apple Orzo Salad

for the salad
  • 2 cups uncooked orzo
  • 1/2 cup golden raisins
  • 1/2 cup slivered almonds toasted
  • about 1/2 red onion
  • 1 large diced granny smith apple
for the dressing
  • 1/2 cup vegetable oil
  • juice of 1 lemon
  • 2 teaspoons salt
  • 1 tablespoon curry powder
  • 1/2 cup white wine vinegar
  • 1/2 cup sugar
  • 1/2 teaspoon coriander
  • 1/2 teaspoon freshly ground black pepper
  • 1/4 teaspoon cayenne pepper
Cook orzo according to package directions then combine all dressing ingredients and mix well.

Pour dressing over warm orzo then add raisins, almonds, onions and apples.

Mix thoroughly then refrigerate overnight.

Monday, April 19, 2010

Does anybody know anything about convection ovens?

I hear convection ovens are amazing for baking and roasting, but that newbies will inevitably burn everything their first few times. The "learning curve" as they call it.

Any suggestions for a beginner?

Sunday, April 11, 2010

Best Birthday Present Ever

Why use 3 utensils when you can use just one? That question was posed to me in the unexpected form of a recent birthday present from my brother.


My brother, the master gift-giver and chili maker, surprised me with this one. I opened the box and saw a gleaming, new, matching set of 8 stainless steel sporks. Yep. Sporks. The curious utensil chimera of junior high cole slaw fame. But wait; they have a serrated edge. It's a knife, too. Sporf? That just doesn't sound right.


But let me tell you that this things are right. They are perfect for potato salad, eating peanut butter right from the jar. Eating peas (they are perfect for peas). And they're even nice enough for company. I laughed, thinking they were a joke, but let me tell you, if you get invited over for dinner at my place, I'm probably setting the table with these bad boys.

Friday, March 12, 2010

Every now and again you just want a big slab of meat

You know those recipes that always say, "Have your butcher prepare the roast . . ." in any of 20,000 strange preparations that you're not really sure what they mean? I don't know about you, but I have plastic-wrapped foam cartons of meat. I don't really have a butcher.


Until now.

www.themeathouse.com

Instead of long, refrigerated bins of prepackaged meat, there are really, honest-to-goodness humans to will cut your meat for you however your recipe says. Heck, they may even have slab bacon which proved so elusive a recipe ago.

I have recently been on a kick trying to find more knowledgeable, dedicated food vendors (like farmers markets) in my area. Any favorites for local, high-quality food where you are?

Sunday, March 7, 2010

Beef Bourguignon


People, I will just warn you that I don't hold any recipe as sacred. So, if anyone is offended by the fact that I have both experimented upon and adapted Julia Child's iconic beef bourguignon, I am sorry. Don't hate me for it. I know that it changed the world. I know that it revolutionized cooking in America, pioneered television cooking shows, and has a pretty good movie made about it. I know it, okay?


I just really wanted some more carrot. And I couldn't really understand why you'd boil the bacon, liked Julia instructs. And I don't cook with alcohol, so I had to come up with something else. And I just get restless, and I like playing around. So there.


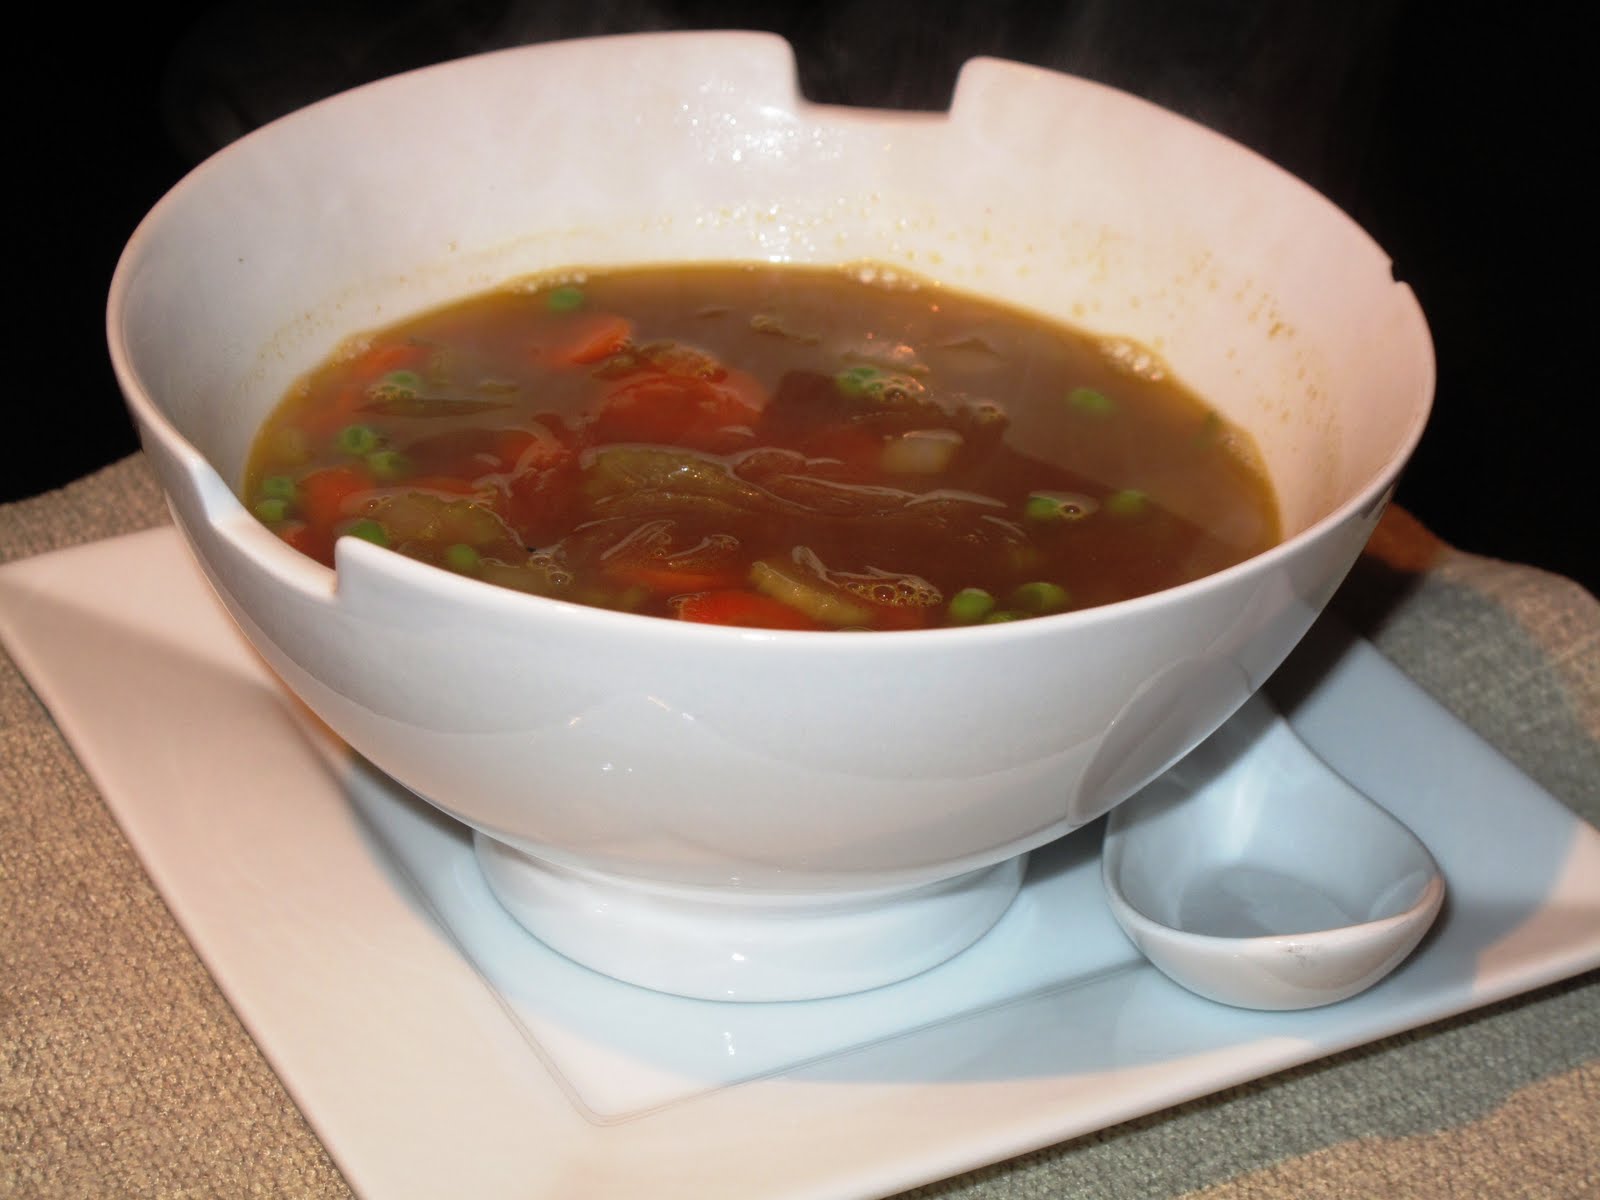
This recipe is seriously time consuming, and is a whole lotta' work, but boy is it good. Julia sure did know what she was talking about. I've been reading through Mastering the Art of French Cooking trying to pick up little tidbits of wisdom, and I'm realizing lots of the magic of really great cooking comes from the tiny little details that are so easy to just skip over, but make such a big difference in the end.


For example, drying the beef first really does cause it to brown so much better. Cooking the mushrooms and onions separately, and then adding them at the end adds such a great little surprise as you get parts of the stew with a different flavor and texture than everything else.


Julia does almost the entire thing in one pot, but I just find it really awkward to have to empty the pan that much, so I do the first couple steps in a separate pan. I think it makes it easier, but you could do it all in one if you like.

Beef Bourguignon

Ingredients
  • 4 strips extra-thick sliced bacon
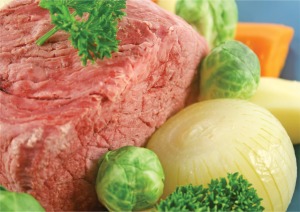
  • 3 pounds beef roast, cut into 2-inch cubes
  • 1 large, sweet onion, cut into thin stips
  • 3 carrots, julienned
  • salt and pepper
  • 2 tablespoons flour
  • 2 cups unfiltered, unsweetened red grape juice
  • 2 tablespoons red wine vinegar
  • About 3 cups beef stock, separated
  • 1 tablespoon tomato paste
  • 3 cloves garlic, finely diced
  • 1 tablespoon thyme leaves, separated
  • 2 dry bay leaves, separated
  • About 18 small, white onions (pearl or boiler onions)
  • Several sprigs chopped, fresh parsley
  • Unsalted butter
  • 1/2 pound fresh mushrooms, sliced
Preheat the oven to 450 degrees. In a heavy frying pan, cook the strips of bacon over medium heat until browned but not overly crisp. Remove from the pan, leaving the fat in the pan as possible. Slice the bacon into short strips.

Dry the beef cubes in power towels. Raise the heat of the stove to medium high, and heat the bacon fat. Sear the beef on both sides in the bacon fat, working with a few pieces at a time (you don't want to crowd the pan). Make sure to let the fat reheat between batches. Once browned, remove them to a plate with the bacon.

When the beef is browned, add the vegetables to the pan and stir until slightly seared. Remove them to a plate separate from the meat. Pour out the fat from the pan. Add a little beef stock to the pan to deglaze, making sure to dissolve all the browned bits.

In a large, oven and stove-proof, covered pan (like a dutch oven), add the meat, flour, and some salt and pepper. Stir until the meat is well-coated. Put in the oven for 5 minutes, then stir the meat around, and return to the oven for 5 more minutes until slightly browned. Remove from the oven, and turn the oven down to 325.

Add the vegetables, grape juice, vinegar, and just enough beef stock until the meat is barely covered. Add the tomato paste, 1 bay leaf, and 2 teaspoons of the thyme. Stir to incorporate. Bring to a boil on the stove, then transfer to the oven, on the lower rack. Allow the meat to simmer for 2 1/2 to 3 hours.

While the meat is cooking, peel the onion (if they still have skins on). Boil an inch of water in a saucepan, then drop in the onions for about 2 minutes. This loosens the skins, and they should come off much more easily.

About 30 minutes before the meat is finished, heat some butter in another pan over medium heat. Add the onions, and stir constantly until browned on the outside. Then add about 1/2 cup beef stock, a bay leaf, the rest of the thyme, and a pinch of parsley. Bring the stock to a simmer, reduce heat, and let simmer until the meat is ready to serve.

Simultaneously, melt a few tablespoons butter in a heavy-bottomed pan over medium heat. Cook the mushrooms a few at a time (don't crowd the pan) until browned.

When the meat is done, remove the pan, and check the liquid for thickness. It should be thick enough to coat a spoon. If it's too thin, simmer a few minutes until thickened. Just before serving, add the onions and mushrooms. Garnish with the parsley leaves. Serve with mashed or roasted potatoes.

Tuesday, February 16, 2010

Homemade croutons


So, a few friends have an fondue party. They tell people to bring something to dip in cheese fondue. Everyone (absolutely everyone) brings a baguette. Some people bring two. Almost none of them get eaten. What do we do now?

Make croutons, of course.


You can put them on salads.


Or put creamed peas all over them (I did this and got about a week's worth of vegetables and butter in one meal: it was incredible).

Or top soup or chili with them. Or make a caponata, bread salad sort of thing. Or just eat them straight by the handful, which is how about 2/3 a baguette of ours went. Speaking of which, there are a few more left, and I'm hungry. Be right back.


Alright, I'm back, and I'm seriously just snacking on a bowl full of these right now. There's seriously just something really good about the crispy outside, with just the right amount of fresh little "give" to the insides, the golden crunch, the gentle herby essence. The best things is, you can kind of just make these with whatever flavorings you want. So open the pantry, and go to town.


Homemade croutons

Ingredients

  • 1 baguette (I used a sourdough one and a French one, and it was a nice combo)
  • extra virgin olive oil
  • salt and pepper
  • herbs (I used ground sage and rosemary, but you can throw in just about whatever you want--maybe a little garlic or Parmesan cheese, even)
Preheat the oven to 450 degrees.

Cut the baguette into 1-inch cubes. Place in a large mixing bowl. Drizzle just a little olive oil over the top, and stir to mix. Drizzle a little more, and stir. Repeat the drizzle & stir thing until the bread is lightly and evenly coated (I did it three times). Sprinkle the salt, pepper, and herbs over the bread a little at a time, stirring in between to coat evenly.

Place the bread in a single layer on a cookie sheet. Place in the oven for about 4 minutes (checking frequently) until the underside is golden. Flip the cubes, and bake for another 4 minutes or so. If needed, flip one more time (or just shake the pan to jumble them up) and bake for a few minutes more. You want the outsides to be crunchy, but the insides to still be just a little soft.